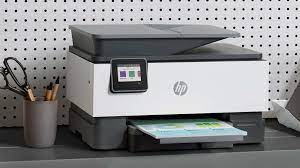
Do you want to print documents without the hassle of wires and cables? If you have an HP Envy Pro 6455 Printer, you can do that easily by connecting it to a WiFi network. This way, you can print from anywhere in your home or office, as long as you have a wireless device and a stable internet connection.
But how do you connect your HP Envy Pro 6455 Printer to WiFi? Don’t worry, it’s not as complicated as it sounds. In fact, there are two simple methods that you can use: cable connection or wireless connection. In this blog, we will explain both methods in detail and guide you through the steps.
Method 1: Cable Connection
The first method is using a cable connection. This means that you will need a USB cable to connect your printer to your computer. This method is suitable if you don’t have a wireless router or if you want to set up the printer quickly. Here are the steps to follow:
- Connect the power cord of your HP Envy Pro 6455 Printer to a power socket and turn on the printer.
- Take a USB cable and plug one end into the USB port on your printer and the other end into your computer.
- Wait for the computer to automatically search for the printer’s driver, download and install it. This process might take some time, depending on your internet speed and computer performance.
- When the process is complete, you should see a message that the printer is ready to be used.
- Now, open the ‘Settings’ of your printer and then press the ‘Wireless Setup’ option.
- Go to the ‘Network Type’ menu and select ‘WiFi’. Now, choose your preferred wireless network from the list and enter the network password if needed.
- Click ‘Confirm’ and the connection will be successfully established.
Congratulations! You have connected your HP Envy Pro 6455 Printer to WiFi using a cable connection. You can now print documents wirelessly from your computer or any other device that is connected to the same network.
Method 2: Wireless Connection
The second method is using a wireless connection. This means that you will not need any cables or wires to connect your printer to your computer or router. This method is suitable if you have a wireless router and if you want to avoid cluttering your workspace with cables. Here are the steps to follow:
- Make sure your HP Envy Pro 6455 Printer is powered on and is in close proximity of the wireless router.
- Open the control panel of your printer and select the ‘Networking’ option.
- Select the ‘Wireless Setup Wizard’ option.
- Choose your preferred wireless network from the list of available networks.
- Enter the network’s password if required.
- Click ‘Confirm’ and the connection will be successfully established.
Well done! You have connected your HP Envy Pro 6455 Printer to WiFi using a wireless connection. You can now print documents wirelessly from any device that has WiFi access and is on the same network as your printer.
How to Test the Connection
Once you have successfully connected your HP Envy Pro 6455 Printer to WiFi, you can start using it to print documents. After the initial setup, the device should automatically reconnect to your network after a few moments of being idle.
To test the connection, you can print a test page from the printer driver. To do this, follow these steps:
- Open the ‘Devices and Printers’ folder on your computer.
- Right-click on your HP Envy Pro 6455 Printer icon and select ‘Properties’.
- Click on the ‘Print Test Page’ button and wait for the page to print.
If the test page prints correctly, it means that the connection is working properly. If not, you might need to troubleshoot some issues with your network or printer settings.
How to Secure Your Connection
To make sure that your connection is secure and your documents are safe, you should change your network’s name and password regularly. This will prevent unauthorized users from accessing your network or hacking into your printer.
To change your network’s name and password, you will need to log into your router’s web interface using a web browser. The exact steps may vary depending on your router model and manufacturer, but generally they are as follows:
- Find out your router’s IP address by typing ‘ipconfig’ in the command prompt of your computer and looking for the ‘Default Gateway’ value.
- Type this IP address into your web browser’s address bar and press enter.
- Enter your router’s username and password when prompted. If you don’t know them, you can check the label on your router or consult its manual.
- Navigate to the ‘Wireless’ or ‘WiFi’ section of your router’s settings and look for the ‘SSID’ or ‘Network Name’ field. Change it to something unique and memorable.
- Look for the ‘Password’ or ‘Security Key’ field and change it to something strong and random. You can use a password generator tool to create a secure password.
- Save your changes and exit the web interface.
You have now changed your network’s name and password. You will need to reconnect your printer and other devices to the new network using the new credentials.
Conclusion
Connecting your HP Envy Pro 6455 Printer to WiFi is not a difficult task if you follow the steps above. You can choose between a cable connection or a wireless connection, depending on your preference and availability of a wireless router.
By connecting your printer to WiFi, you can enjoy wireless printing from anywhere in your home or office, as long as you have a wireless device and a stable internet connection. You can also secure your connection by changing your network’s name and password regularly.
We hope this blog has helped you to connect your HP Envy Pro 6455 Printer to WiFi. If you need more support, you can chat with HP Printer Support team. They will be happy to assist you with any issues or queries you might have.